Posts Tagged ‘18 holes course’
New Kuta Golf Hole
Last Updated on Tuesday, 4 January 2011 02:07 Written by admin Friday, 2 April 2010 07:20
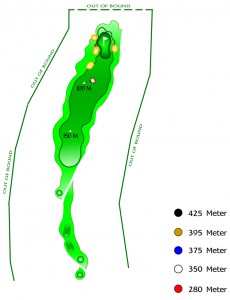
HOLE 1 – PAR 4
The tee shot needs to be played right of center whilst avoiding the fairway bunkers on both sides of the landing area. The club chosen for the second shot will depend on the pin position on this well protected & sloping green, and with green - side bunkers on the right, it is safer to hit to the left side of the green. Straight forward at first glance but to open with a par will be start to good day’s golf.
HOLE 2 – PAR 5
The right side is preferable off the tee as it gives you a clear shot at the green for your second shot. Anything left will leave you with a tough second shot or in the fairway bunker. A second shot must be played to the center of the green gives you an easier chance to make par due to the green - side bunkers on the left & right.
HOLE 3 – PAR 4
Keep tee shots down the right side unless you are a long hitter as this side of the fairway offer you a better chance of good placement of the second shot at the same time avoiding the deep fairway bunker on the left side of the landing area. The approach to this narrow green is the true challenge due to it being so well guarded by green-side bunkers on both sides. Making a par here is most satisfying.
HOLE 4 – PAR 4
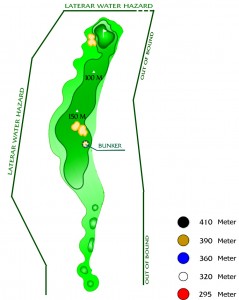
There is more space to the right side of the fairway center line than you might think, so aim middle or right of middle off the tee to this narrow fairway. The approach must carry over a large green-side bunker on the right of the green. A large green, well contoured is a good test for even most skilled of putters.
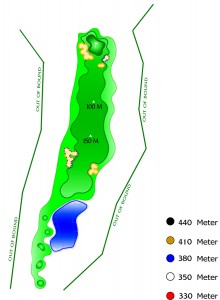
HOLE 5 – PAR 4
An extremely testing Par 4. An accurately judged tee shot laying-up short of the lake protecting the front of the green gives you a better chance of getting close to the pin with your second shot. The green is long but narrow and the left side is positioned along the lake edge while the right side is well bunkered, don’t let the relative shortness of this hole fool you into believing and birdie is a certainly.
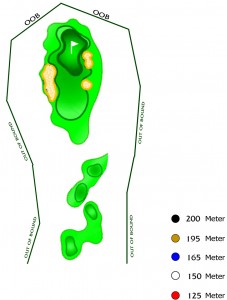
HOLE 6 – PAR 3
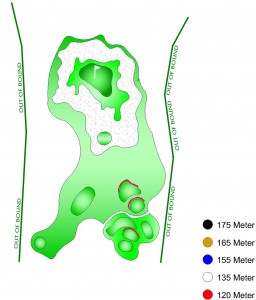
This hole features a large green of over 1,000 m2, so if the pin is to the back make sure you have selected enough clubs. Take note of the strong cross wind that blows across this island green. There in no room to miss the green as it lies in a sea if white sand bunkers.
HOLE 7 – PAR 4
Position is important on this long slightly up-hill par 4 and there is more room to the left off the tee than you might think. Avoiding the fairway bunker to the right of the landing area is essential. Make sure your second shot has enough distance to reach the various pin placements as this is a very long green with a very deep swale in front well protected by bunkers on both sides.
HOLE 8 – PAR 3
One of the prettiest and most demanding Par 3’s anywhere. Although missing the green to the right is the safer option, the grassy hollows and long narrow green call for an accurate pitch. To the left there us a deep water way which will catch any wayward ball. Tress around the green make a perfect backdrop to this well bunker green.
HOLE 9 – PAR 5
Aiming center of left center of the fairway from the tee will give you a clearer second shot while avoiding the tough-deep fairway bunker. The second shot requires precision with placement as the small landing area is surrounded by more-deep fairway bunkers. From the second landing area you will be faced with a short iron into a long, double stage green of over 1,300m2 in size which is well protected by traditional pot bunkers to the rare large green-side bunkers left and right.
HOLE 10 – PAR 4
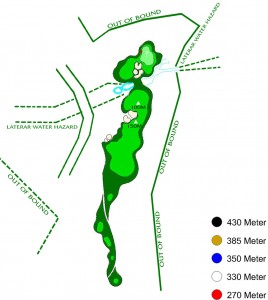
Unless you hit a good drive, it may be advisable to lay up with your second. If your tee shot is long enough to almost reach the bunker in the right side of the fairway landing area then you have an opportunity to pay to reach this well bunker and long green. If not, a short iron will leave you a short pitch in. Water to the left side of the fairway may catch a wayward tee shot, so if you’re going to “have a go” at crossing the water mass then “give in plenty”.
HOLE 11 – PAR 4
You have two choices. Lay up with a mid iron leaving yourself with a mid to long iron second depending on the pin position, or risk the driver to a narrow fairway leaving yourself a short iron in to a green split by a deep hollow and a pot – style fairway bunker on the right. When you reach the center of this fairway you will greeted with a majestic view as it opens up to the vast Indian Ocean. A well placed approach is essential as the green has water to the left and three treacherous pot-bunkers on the right.
HOLE 12 – PAR 3
The note of the pin position before selecting your club. If you leave yourself along putt it is very difficult to judge the line, so make sure you have enough club selected from the tee. There are two interesting tee positions, with the far left championship tee being the most challenging as it pays straight into the ocean breeze. Try not to be distracted too much by the sounds of waves crashing on the world famous Dreamland beach, a surfing haven directly behind the green.
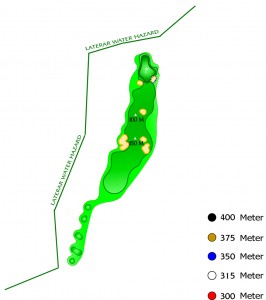
HOLE 13 – PAR 4
The longest testing Par 4 with water in front of the teeing area and fairway bunkers to the right. A large well guarded green greets well placed approach shots that vary from long irons and fairway wood to mid and short irons as the wind really picks up and blows across this fairway especially in the mind late afternoon.
HOLE 14 – PAR 4
A long Par 4 which usually plays into a prevailing wind. The left side of the fairway is the most direct and shortest way to the green however require extreme accuracy and long hit carry the mass on the fairway bunkers. The second shot is played downhill to an elevated green with playing here, as its back-drop is booth one of the Worlds prettiest beaches and Indian Ocean. If you feel you cannot carry the bunkers short of the green with your second, lay up and rely on a pitch and putt for par. Even a bad score on this hole is rewarded with the sheer beauty of the fabulous surroundings.
HOLE 15– PAR 3
New Kuta Golf & Ocean View Resort’s most Famous Picturesque golf hole, overlooking the coral reef of Balangan Bay. The most difficult pin placement here is needed to avoid bunkers both in front and behind this very narrow section of the green. The wind off the see is very tricky to judge. Tack enough time to absorb the true wonder of this little corner of paradise.
HOLE 16– PAR 5
It is best to drive the ball down the center left of the fairway without catching the deep swales that run down the gully on the left side. Tricky pot-bunkers guard the right side of this narrow fairway. Lay up with the second shot if you want to maximize the possibility of hitting the center of this narrow green that is well guarded by extremely large bunker on the left and opt-bunker on the right Long hitters could attempt to carry the fairway bunker on the left. An exciting hole that usually plays down-wind as it heads back inland away the Ocean.
HOLE 17 – PAR 4
A player of average length can safely play to the center of the fairway while those who try to go long from the tee will have to be accurate enough to “split” the center of a narrows landing area with pot-bunkers to the right of the fairway. This is regarded as one of the toughest and longest finishing holes in Asia as the green is not only long and narrow but run’s to the left catching any sliced or over-faded approach shots in deep traditionally Scottish in design, pot-bunkers to the right of the green.
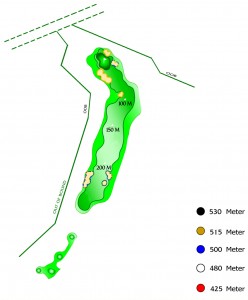
HOLE 18 – PAR 5
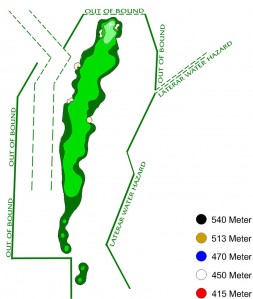
A long winding finishing hole that will test those exhausted golfers who though “the game as all over” Lay up from the tee is you don’t have the accuracy to split the narrow landing area that is also well guarded by bunkers on both sides. The Second shot is equally important as it plays from left of the green. Massive bunkering from 50 meters in ensures that a wayward shot will be challenged if Par is desired score. A long green in full view of the clubhouse is well contoured to provide the ultimate putting test. The splendor if the clubhouse welcomes tired and wary golfers who have been exhausted by the sheer beauty and challenges that make this golf course famous.
In this Page, Golfers looking for:
- bali golf courses kuta
- new kuta golf
- kuta golf resorts
- kuta golf course
- kuta golf club
- new kuta golf links bali
- hole 14 bali nirwana golf
- golf courses in kuta
- New Kuta 18 hole golf course
- golf courses in bali in kuta
Tags: 18 holes course, bali golf, bali package, bali vacation, golf club, golf course, golf packages, hole in one, New Kuta Golf, Tournament | Posted under Golf Hole, New Kuta Golf | 31 Comments
